How to Grade a Yard with a Skid Steer: Complete Guide
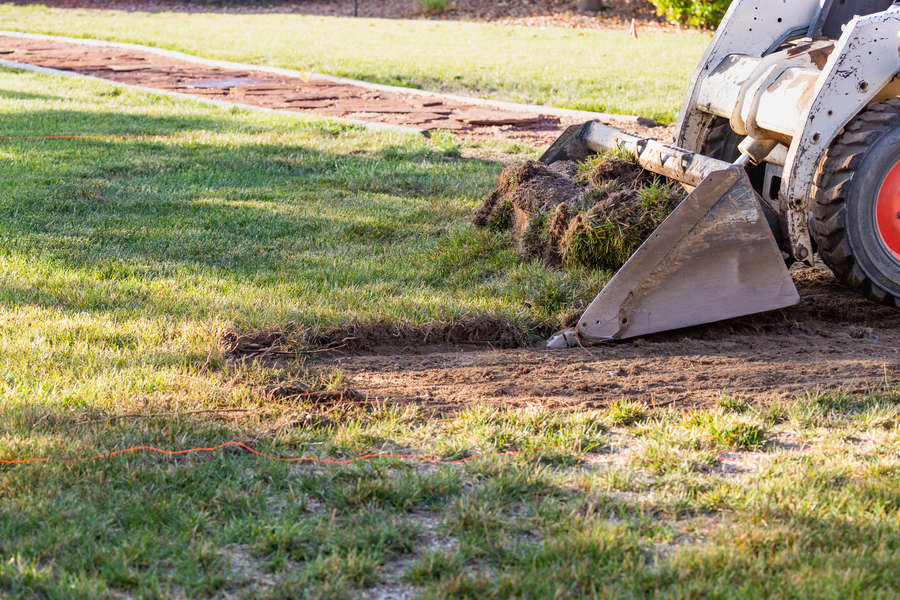
Table of Contents:
- TL;DR
- Why Yard Grading Actually Matters for Your Home?
- Essential Equipment and Tools You'll Need
- Make Sure Your Area Is Properly Prepared
- Establishing Proper Slope and Elevation
- Final Grading Techniques
- Water Away From Your Home: Drainage Essentials
- Professional Tips for Success
- Finishing and Landscaping Preparation
- Grade Your Yard With Quality Equipment From Skidsteers.com
- Frequently Asked Questions
TL;DR
- Proper yard grading diverts water flow away from building foundations, preventing structural damage and eliminating mosquito breeding sites and lawn diseases caused by pooling.
- Using a skid steer equipped with a suitable bucket attachment significantly increases the efficiency of both rough and final grading processes compared to manual techniques.
- An optimal yard slope drops approximately one inch for every ten feet of distance from the residential structure to ensure stable drainage without erosion.
- Grading preparation requires contacting local utility marking services to map underground lines and removing all debris prior to beginning operations.
Yard grading is one of those landscaping projects that can transform your property while protecting your home from costly water damage. If you have access to a skid steer, you're well-equipped to tackle this project yourself. This equipment makes yard grading significantly more efficient than manual methods, and with the right approach, you can achieve professional-quality results.
Read our full guide: Skid Steer Business Guide
Why Yard Grading Actually Matters for Your Home?
When you grade a yard properly, you're doing much more than creating an attractive lawn. Proper grading directs water away from your home, preventing foundation damage that can cost thousands to repair. Without adequate drainage, water will pool around your house, potentially causing structural problems over time.
Make sure your yard has the right slope, and you'll notice immediate benefits. Uneven ground makes grass cutting difficult and creates safety hazards. Low spots become breeding grounds for mosquitoes and promote lawn diseases. A well-graded yard ensures consistent grass height when mowing and provides better growing conditions for your lawn.
The drainage improvements alone make this project worthwhile. Water that flows away from your house instead of pooling around the foundation protects your investment and creates a healthier outdoor environment.
See our tips: House Foundation Guide
Essential Equipment and Tools You'll Need
Your skid steer needs the proper bucket attachment for effective yard grading. Choose one with lower sides and an extended bottom that reaches at least two inches beyond your tire width. This prevents the machine from leaving tracks on freshly graded soil.
Here's what you should have ready:
Grade stakes and string for maintaining level accuracy
Hand rake for detailed finishing work
Measuring tape for precise calculations
Garden hose for drainage testing
Shovel for manual work in tight spots
Safety equipment including gloves and eye protection
Professional contractors emphasize having all tools ready before starting. This preparation saves time and ensures smoother workflow throughout the project.
Read our full guide: Lawn Leveling Guide
Make Sure Your Area Is Properly Prepared
Before starting any grading work, assess your surroundings carefully. Contact your local utility marking service to identify underground lines, plumbing, and sprinkler systems. Damage to these utilities can turn a straightforward landscaping project into an expensive repair job.
Also check overhead clearances. Trees, power lines, and building overhangs can interfere with bucket movement. Make sure you have adequate space to operate safely.
Remove all debris from the work area - grass clumps, weeds, rocks larger than a tennis ball, and other obstacles. Use temporary fencing to contain debris and dirt within your work zone. This preparation step is essential for achieving clean, professional results and preventing damage to existing landscaping.
See our tips: Backyard Makeover Ideas
How to Grade a Yard: The Complete Process
First Step: Rough Grading Work
Begin by identifying high and low areas throughout your yard. The goal is to take soil from elevated spots and use it to fill depressions, creating a more even surface. This rough grading establishes the basic slope that will direct water away from your house.
Create a spoil pile for excess dirt in an accessible location. You can use this material for other landscaping projects or arrange for disposal. If your yard has significant low areas, calculate how much additional soil you'll need and have new material delivered before proceeding.
Work systematically across the area, moving soil from high points to low ones. This process helps establish the proper drainage pattern while minimizing the amount of dirt you'll need to handle during final grading.
Establishing Proper Slope and Elevation
Professional grading requires accurate measurements. Set up grade stakes connected with string to guide your work. Establish a benchmark using your house foundation or another permanent reference point.
The ideal slope drops approximately one inch for every ten feet of distance from your house. This gradient provides adequate drainage without creating erosion problems. Measure carefully and mark stakes to maintain consistency across the entire area.
Use a builder's level or transit to ensure accuracy. Having someone assist with measurements helps maintain precision and speeds up the process.
Final Grading Techniques
Use the back of your skid steer bucket as a grading blade, operating in reverse at controlled speeds. Keep the bucket flat with arms positioned low to the ground. Make minor adjustments to bucket angle rather than arm position for better depth control.
Work in manageable sections, completing each area before moving to the next. Many professional operators prefer working diagonally across the yard to better assess level accuracy. Take your time during this phase -precision here determines the quality of your finished surface.
Professional tip: Use consistent speed and smooth movements. Sudden motions or wheel spinning in soft soil can undo hours of careful work.
Read our full guide: Kubota History and Manufacturing
Water Away From Your Home: Drainage Essentials
Proper drainage is the primary objective of yard grading. Your finished surface should direct water away from all buildings toward natural drainage areas or storm water systems. Make sure the slope remains consistent - sudden grade changes can create erosion or standing water problems.
Test your drainage by flooding the area with garden hoses. Watch carefully for any spots where water pools or flows toward your house. These locations need additional attention. Use your skid steer to remove soil from high spots and fill problem areas until water flows correctly.
Remember that even small improvements in drainage can prevent significant damage over time. Water that flows away from your foundation protects your home's structural integrity.
Professional Tips for Success
Professional contractors emphasize smooth, controlled movements when operating equipment. Jerky motions or aggressive techniques often create more work than they solve. Start at low speeds and gradually increase as you become comfortable with the controls.
Important considerations:
Work each section of soil only once when possible
Make sure soil conditions are neither too wet nor too dry
Take regular breaks to assess progress from different angles
Keep a hand rake available for precision work around delicate plants
Know when to stop and avoid overworking the soil
Even experienced operators continue learning new techniques. Don't expect perfection on your first attempt - good grading skills develop with practice.
Finishing and Landscaping Preparation
Once grading is complete, prepare your yard for its intended use. If you plan to plant grass, ensure the finished grade sits two to three inches below walkways and driveways. This accommodation prevents drainage problems when you add soil and sod.
Take time to rake the surface smooth and remove any remaining debris. Check that drainage patterns work as intended and that water continues flowing away from structures. These final details separate amateur work from professional results.
Grade Your Yard With Quality Equipment From Skidsteers.com
Consider the long-term benefits of your efforts. Proper yard grading provides the foundation for healthy grass growth, easier lawn maintenance, and effective water management. Whether you're solving existing drainage problems or preparing for new landscaping, this project enhances both the function and appearance of your property.
Good yard grading requires patience, proper equipment, and attention to detail. With careful planning and systematic execution, you can create a yard that protects your home while providing an attractive, functional outdoor space for years to come.
Get started on your yard grading project with confidence, knowing you have top-tier attachments that would make any professional contractor proud. Our specialized store offers a comprehensive selection of grading attachments, buckets, and tires that would be perfect for your yard grading project. Visit skidsteers.com today to explore our full range of skid steer attachments and grading accessories.
Frequently Asked Questions
What is the ideal slope for proper yard grading?
The ideal slope drops approximately one inch for every ten feet of distance away from the house foundation. This gradient provides adequate water drainage without causing soil erosion.
What is the recommended skid steer bucket size for yard grading?
It is recommended to use a bucket attachment with lower sides and an extended bottom that reaches at least two inches beyond the width of the machine's tires to prevent tire tracks from remaining on the freshly graded soil.
How do you test the effectiveness of yard grading?
The drainage pattern can be tested by flooding the graded area with garden hoses and observing the flow. Any spots where water pools or flows back toward the structure indicate areas that require additional soil adjustments.